
Describes how to provision users with Microsoft Entra ID (formerly Microsoft Azure Active Directory) through SCIM 2.0
Introduction
Use this guide to synchronize employee data from Microsoft Entra ID (formerly Azure AD) to Eletive. For addtional detailed information about the SCIM 2.0 API used by Microsoft, read the User Provisioning - SCIM 2.0 documentation from the start (this guide will repeatedly refer to that documentation).
Prerequisites
- An Entra ID (formerly Azure AD) Tenant
- A user account in Entra ID (formerly Azure AD) with permission to configure provisioning
- A user account in Eletive with administrator access (oftentimes, the IT resource that will be assigned to configure user provisioning is given the administrator role in order not to interfere with the Eletive onboarding that HR administrators are part of)
Cloud and Local: https://azure.microsoft.com/en-us/services/active-directory/
User provisioning for Microsoft Active Directory through SCIM 2.0 is only supported through the hosted Microsoft Entra ID. However, there is a solution even if a local on-premise Active Directory is currently being used. In that case, the data should be synced to Azure Active Directory using Azure AD Connect as described here.
Setup
In Eletive - Active the "Integrations" and "SCIM 2.0" features
- Navigate to "Settings -> Feature"
- Enable the "Integrations" and "SCIM 2.0" toggles
- Navigating to "Settings -> Integrations"
- Select "User Provisioning."
- Press "Connect"
- Save the "SCIM 2.0 URL" and "Bearer Token" for later, as this will be needed in the Azure Portal
In Azure Active Directory
Step 1 - Add the Eletive Enterprise Application
When the sync is set up, only enable syncing of users and not groups as this is not supported at this time.
- Navigate to "Enterprise applications" and select "All applications"
- If you are already using Eletive for Single Sign-On with Entra ID (formerly Azure AD) then you should have Eletive listed. If not, please select "New application" in the menu
- Search for "Eletive" in the app gallery, select it, and add it
Step 2 - Configure Provisioning Settings
- When the app is created and opened, navigate to "Provisioning" and configure/use the following settings:
- Set the Provisioning Mode to Automatic.
The remaining configuration is divided into 3 different sections: Admin Credentials, Mappings, Settings - Admin Credentials
- Tenant URL: Add the "SCIM 2.0 URL" from Eletive.
Note: By adding "/?mode=azure" to the URL, special handling will be enabled to manage one of Azure's known bugs (more specifically, sending booleans as strings). - Secret Token: Add your "Bearer Token" from Eletive
- Press "Test Connection" and verify that the connection works
- Tenant URL: Add the "SCIM 2.0 URL" from Eletive.
- Mappings
- Click on "Provision Azure Active Directory Users" which will open a new view.
- Enable: Set to "Yes"
- Target Object Actions: Check the Create, Update and Delete boxes.
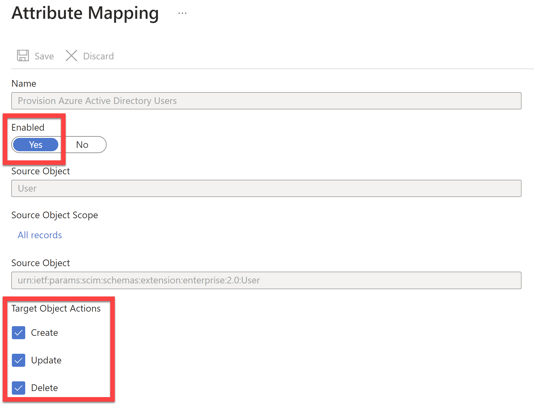
- Note: Eletive does not support a soft delete operation to delete a user. However, a soft delete operation can be used to turn off the survey participation for the user (see more about this example below in section "Example 3: Eletive participate in survey" )
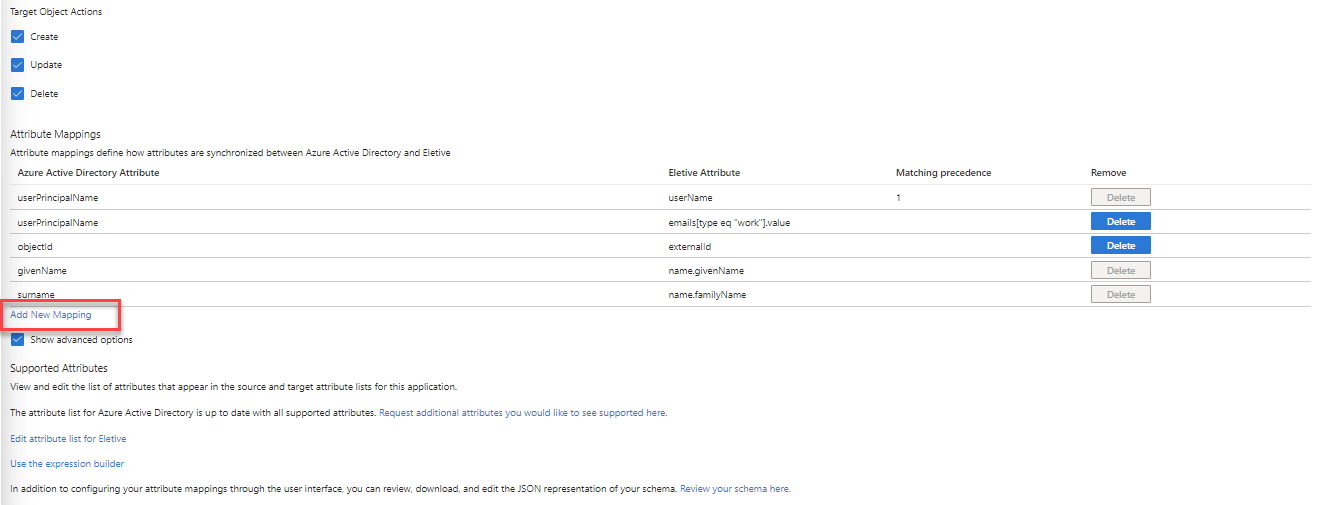
- Under Attribute Mappings you will map attributes (i.e. fields) between Azure AD and Eletive:
- The default field mapping is shown in the list, and new ones can be added.
- To add New fields/attributes, read under the next section, Add New Mapping, for instructions and examples. Proceed to this section before saving and moving on to Settings and Step 3.
- Save to exit to the previous view
- Click on "Provision Azure Active Directory Users" which will open a new view.
- Settings
- Check the different options, based on Notification Email (optional), Prevent accidental deletion (optional), and Scope.
Step 3 - Turn on the user provisioning synchronization
Configure these settings:
-
- Provisioning Status: On
- Press "Save" to finish the setup and activate provisioning
Add New Mapping
Attributes and managers need to be set up manually in Entra ID (formerly Azure AD), as there are no native fields for that. Therefore, before adding a new mapping, you have to first add the Eletive attribute in the attribute list. See the User Provisioning - SCIM 2.0 documentation for how to utilize the extensions for attributes and managers.
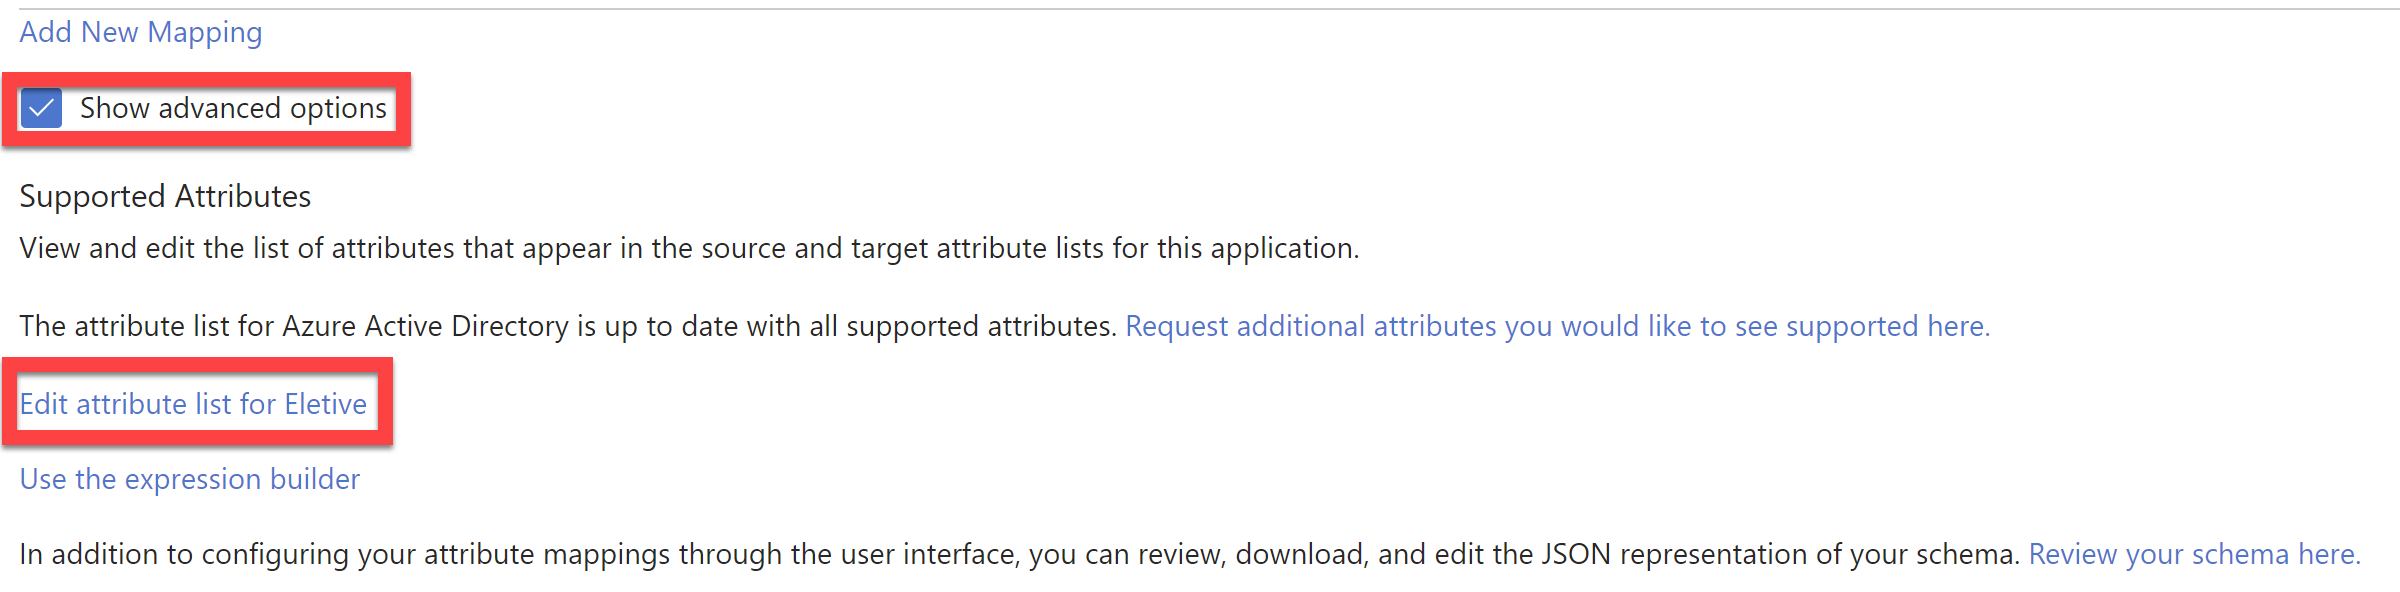
- Check the "Show advanced options"-box, then click on "Edit attribute list for Eletive", which will open the attribute list.
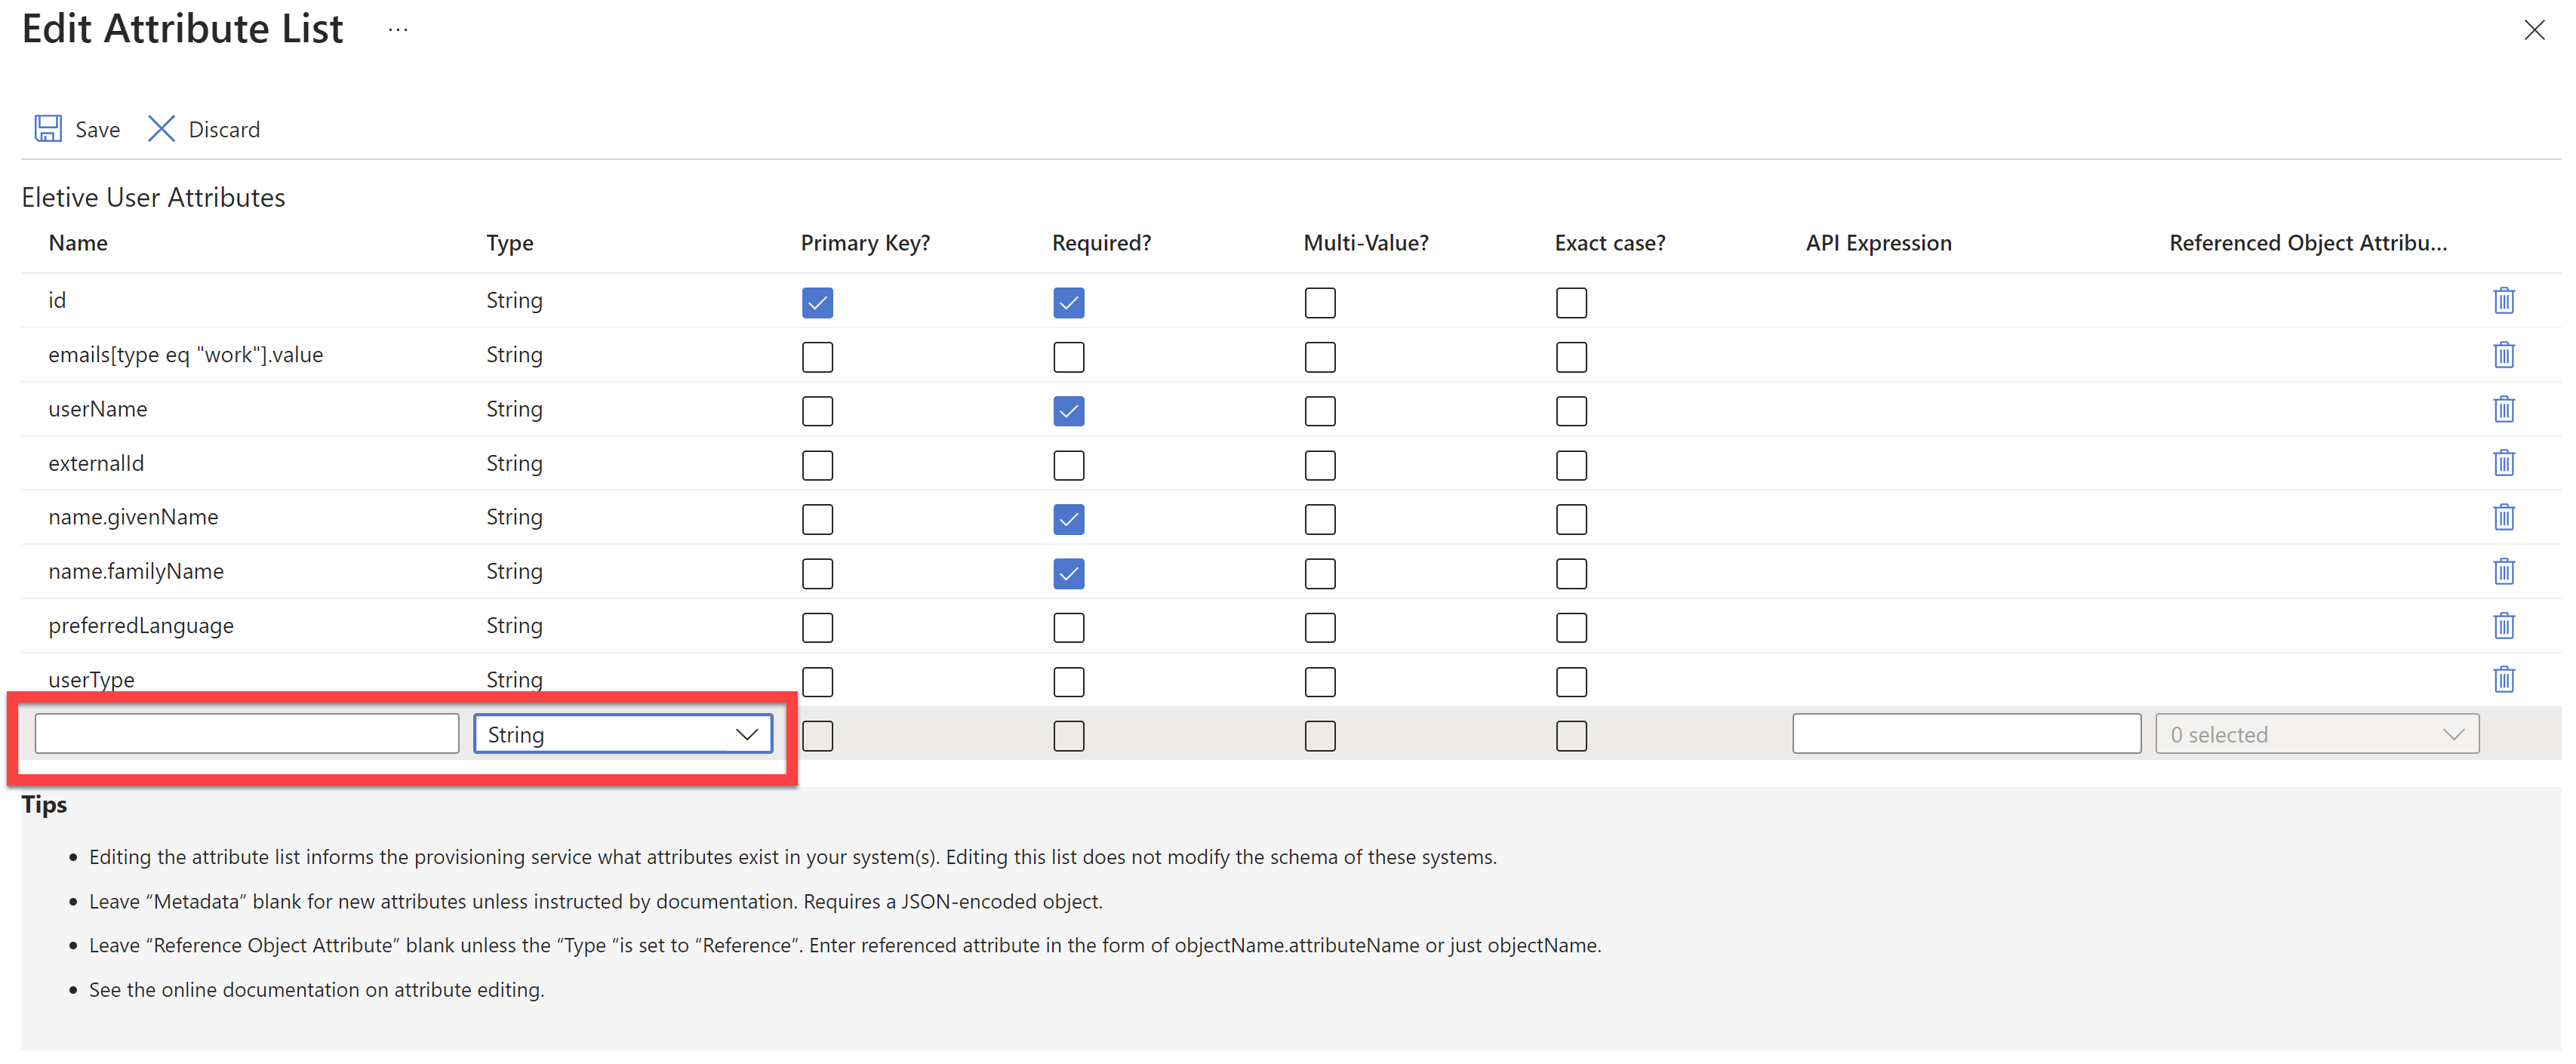
- In the attribute list, you primarily have to add the Name and Type of the attribute:
- If adding an Eletive attribute of type: Choice, Numbers, Date provide Name as:
urn:ietf:params:scim:schemas:extension:eletive:2.0:User:ATTRIBUTE NAME
- Replace "ATTRIBUTE NAME" with the Eletive attribute name
- If adding an Eletive attribute of type: Users provide Name as:
urn:ietf:params:scim:schemas:extension:eletive:2.0:User:USERSATTRIBUTENAME:externalId
Replace "USERSATTRIBUTENAME" with the Eletive attribute name- NOTE: It is required to map:
- objectId --> externalId
- NOTE: It is required to map:
- If adding an Eletive attribute of type: Choice, Numbers, Date provide Name as:
-
- Select Type based on the attribute type as specified in the table below:
Attribute type in Eletive Type in Entra ID (formerly Azure AD) Choices String Dates DateTime Numbers Integer Users (Email and ExternalId) String
NOTE: Date and Number attributes need to be created first in Eletive to work because Entra ID (formerly Azure AD) SCIM only sends strings even if Integer or DateTime is used. Moreover, Azure will not send empty parameters which means that if a segment is removed, it will still remain in Eletive.
- Select Type based on the attribute type as specified in the table below:
-
- Once finished adding Eletive attributes to the attribute list, press "Save". You will automatically go back to the Attribute Mapping. They can now be used in mappings.
- Under Attribute Mappings, click on Add New Mapping
- In the Edit Attribute view fill in the following information:
- Mapping type: Select what is appropriate
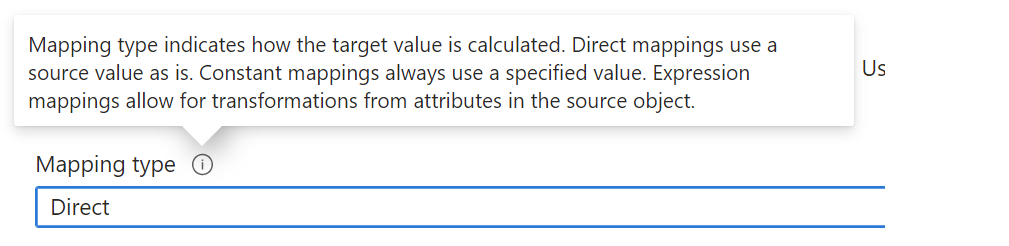
- Source attribute: Depending on Mappning type add the source attribute
- Target attribute: Add the attribute you created in the previous step
- Other fields are optional, leave these as is or configure them based on your preference.
- Mapping type: Select what is appropriate
- Once finished press Ok. Your mapping has now been added, repeat this process to add the attribute you wish to map.
- In the Edit Attribute view fill in the following information:
Below are some examples of Eletive-specific attribute mappings.
Example 1: Eletive segment manager
In Eletive, different segments have different managers and one segment can have multiple managers. The data needed in Entra ID (formerly Azure AD) on the user level could, for example, be fields called "Manager_AttributeName1" and "Manager_AttributeName2". These fields would then contain the segment name within that attribute that the user is the manager for. In Entra ID (formerly Azure AD), edit the Attribute List and add an attribute like this:
- Name:
urn:ietf:params:scim:schemas:extension:eletive:2.0:User:manager[attribute eq "AttributeNameInEletive"].value
- Replace the "AttributeNameInEletive" with the correct value
- Type: String
Now add a mapping:
- Source attribute: Use the field in Entra ID (formerly Azure AD) containing the segment name
- Target attribute: Use the newly created attribute above
Let's say that we have an attribute "Country" in Eletive and which contains the segment "Germany". We also have a user "example@eletive.com" who is the manager for Germany. We could then have a field in Azure AD called "Manager_Country" and the user "example@eletive.com" would then have the value "Germany" in it. In Entra ID (formerly Azure AD), edit the Attribute List and add an attribute like this:
- Name:
urn:ietf:params:scim:schemas:extension:eletive:2.0:User:manager[attribute eq "Country"].value
- Type: String
Now add a mapping:
- Source attribute: Manager_Country
- Target attribute: Use the newly created attribute above
The setup depends on the organization and what needs it has. NOTE: Entra ID (formerly Azure AD) will not send empty parameters which means that if a manager is removed, it will still remain in Eletive.
Example 2: Eletive language
If the user language should be transferred to Eletive follow the guide below. Please note that if the user changes language in Eletive, that choice would then be overwritten upon provisioning. This is the reason that this is not included by default.
- Add a new mapping
- Mapping type: Expression
- Expression:
ToLower(Left([preferredLanguage], 2), )
- Target attribute: preferredLanguage
Example 3: Eletive participate in survey
If the user should no longer participate in the survey, a boolean (not a string which is a common mistake in Entra ID (formerly Azure AD)) can be sent through an extension according to the documentation above. This is not included in the default mapping because the use case may vary. Below is an example of when soft delete is used to turn off survey participation. For more information about expression, see Microsoft's documentation. Expressions can be used to convert a string to a boolean if Entra ID (formerly Azure AD) sends a string.
However, please note that Microsoft has a known bug for the patch operation sending strings instead of booleans which is not correct according to SCIM 2.0. Eletive has added special handling to cope with this. To enable this, add the optional parameter "/?mode=azure" to the Tenant URL under the Admin Credentials as instructed above. If adding this after already establishing a connection, make sure to generate a new bearer token in Eletive as the old one is revoked. There are also other suggested solutions which can be found here.
- Add a new mapping
- Mapping type: Expression
- Expression:
Not([IsSoftDeleted])
- Target attribute: urn:ietf:params:scim:schemas:extension:eletive:2.0:User:participateInSurvey
Note: The above clearly states how you provision users by communicating with the SCIM 2.0 API of Eletive. Eletive wants our customers to be happy and we gladly help you with Eletive-related challenges, such as questions about our API. However, we cannot guarantee consulting capabilities in other systems than Eletive such as HRIS-systems, Microsoft Entra ID (formerly Microsoft Azure Active Directory), Salary systems, etc. For this reason, Eletive does not do any consulting in other systems than Eletive, which is by default stated in Terms and Conditions in customer contracts.